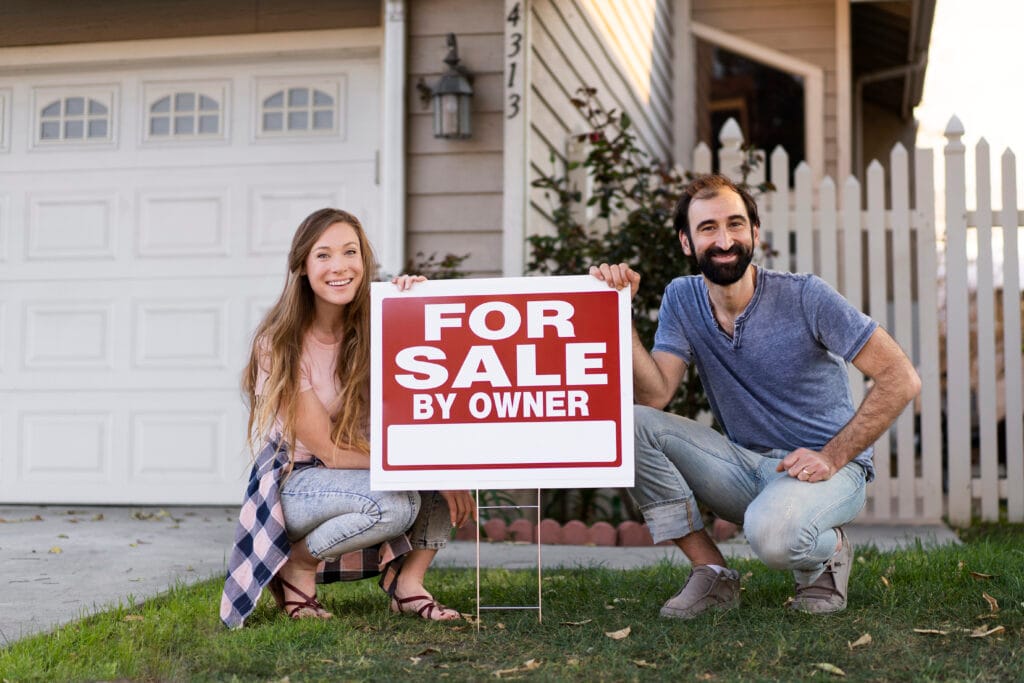
In this article we give you a step by step guide on how to sell your house without a real-estate agent, in Montreal. Whilst the guide is specific for Montreal, the steps we discuss apply to the whole of Quebec.
If you can sell your house without a real-estate agent, you can save tens of thousands of dollars in real-estate commission fees. However, even if you decide not to be a For Sale Buy Owner (FSBO) home seller, you can still benefit from this article by being able to tell what services good realtors provide vs bad, lazy or even (dare we say) dishonest real-estate agents.
So – without further ado, here is how to sell your house without a realtor in Montreal.
- Set your list price
- Prepare your documents
- Marketing your property
- Sell your property
- Negotiate with prospective buyers
- Navigate the conditions period
- Know your rights and obligations
- Final remarks
** IMPORTANT **
1. Set your list price
The first thing that you must do is to set you list price for your property. This is the price you want buyers to pay when your property is listed for sale. To work out a list price, you must study the wider Montreal real-estate market and the local neighbourhood market.
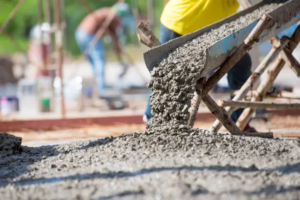
In your local neighbourhood, you will need to understand what the housing stock. This includes knowledge of building materials and construction methods used, common maintenance issues, zoning laws, typical property ages, and upcoming new developments that could make the area more desirable. For example, in some areas of Montreal, homes built in the 70’s used concrete in their foundations that contained pyrite, which can expand over time and cause cracks or structural damage. Issues like these can lower the value of your home and should be considered when setting your price.
You should also also know what is the demand for different property types in certain neighbourhood’s and use key metrics such as Average Days On Market (DOM), number of transactions, sales to list price (split by property type) and so on, in order to know how the market is expected to evolve month to month. For instance, during the gentrification of Griffintown in 2008, condo prices in Griffintown rose fast and DOM was low. In a market like that, you could set a list price above comparable homes to ride the market’s upward momentum.
You will use the data that you collect about the market to run a Comparative Market Analysis (CMA), of your property. This is a study that essentially informs what could be a fair list price is for your property. This should be a list price that both attracts qualified buyers and neither undervalues or over values your home.
2. Prepare your documents
There are two documents that you must have before you can sell your home:
The seller’s declaration tells the buyer about the condition of the property (defects, repairs, systems, etc.), so that they can best assess its value. And the certificate of location tells the buyer about the property’s boundaries, structures, and legal limitations which helps the buyer assess how they can use the property (e.g., renovations, expansions, or occupancy). Let’s dig into what are these documents and why they are important and how to complete them.
Note:
– Any permits or certificates for renovations / improvements
– Other documents for special cases for example, Septic system certificates (for properties with wells or septic tanks), Heritage or environmental compliance certificates if applicable and so on.
The sellers declaration
The sellers declaration is a mandatory template form that the home owner must complete when they put their home up for sale. In this document, you must outline everything you know about the home, including the year it was built and whether it uses a well or municipal services and so on. You must also discloses any issues observed while living there, including plumbing problems, water infiltration, structural concerns, to name a few.
Some sellers find it uncomfortable to list every known defect in a property they plan to sell. However, you must complete the seller’s declaration in an honest and thorough way for three main reasons:
- Ensure a smooth selling experience
- To reduce the risk of latent defects
- To price your home correctly
Let’s take a look at each of these points now.
Ensure a smooth selling experience
First, most buyers will get a pre-purchase inspection before finalizing their transaction. If the inspection uncovers major issues that you did not disclose before the buyer submitted an offer, the buyer may ask for a large price reduction or they can legally withdraw from the transaction. If the buyer walks away, you must re-list the property and you are now also legally required to disclose the inspection findings to future buyers anyway.
To reduce the risk of latent defects
Second, problems in the home that existed at the time of sale and were not discoverable during a normal inspection count as latent defects, whether or not the seller knew about them. In this case, if the seller did not know about the defect, they may still have to cover the cost of repairs or compensate the buyer for the reduction in property value. However, if the buyer can prove that the seller deliberately concealed the defect, then the seller may face legal claims for damages, including cancellation of the sale, reimbursement of the purchase price, and possibly additional court-ordered compensation.
To price your home correctly
When you set your list price, you ran a CMA to compare the price of your home with other similar homes in your neighbourhood. However, you do not necessarily know if those homes have hidden defects just by looking at the listing. Some properties look great on the surface, but sell massively under market value because of a structural issue casual viewer’s are not aware of.
After you complete the seller’s declaration, you can determine whether to adjust your property’s price to account for any major home repairs. For example, if you know about a leaky roof, you can lower your asking price to reflect the cost of these repairs. You do not need to list every repair, for example a scratch on the inside of a cupboard door is not going to influence the price of a home. However, if you ignore a major issue, the buyer’s lender may reduce or refuse the mortgage after the home appraisal. This can cause the sale to fall through or force you to renegotiate the price.
Two Quick Tips:
2. There are X different templates from the OACIQ, depending on the different type of property e.g. condo vs single family home that you are selling. You can find a complete list of the forms on the OACIQ website.
The certificate of location
The certificate of location is essential to your transaction because it tells prospective buyers the exact boundaries of the property, the location of buildings and structures, and whether there are any servitudes, encroachments or zoning issues i.e. rules that prohibit what you can do with the property.
A buyer needs this information to help them understand what they are buying from you. If for example, you own a plex in Verdun that you converted into a single family home, was this done legally? If it wasn’t, the buyer may decide not to purchase the home, since they would have to pay to restore the property to its original configuration.
The certificate of location must be up to date. You will need a new certificate of location if you have made any updates to your property or if 10 years has passed since the date on your current certificate of location. To get a new certificate of location, you will need to hire a land surveyor. In Quebec, a land surveyor must be a member in “good standing order” of the Ordre des Arpenteurs-Geometres du Quebec” (OAGQ). The OAGQ have developed a portal where you can search for a Land Surveyor. It typically takes 3 – 4 weeks to order a new certificate of location.
3. Marketing your property
Once you have your necessary documents, the next step is to create your listing and to start marketing your property.
94% of home buyer’s start their home search online. This means that the buyer goes to Google and searches for homes in the location that they want to buy in. From there, the buyer will click through different websites and start to shortlist properties that are within their price range and meet their criteria.
In practice, this means that marketing your home is about ensuring your property stands out immediately in a crowded online marketplace. Buyers will compare dozens of homes before ever booking a visit and if your home doesn’t capture their attention within a few seconds, they will skip it and move onto the next property.
To do this without a real-estate agent, you will need to complete (at least) the following three steps.
For seller’s of luxury detached houses, agents may decide to create a brochure for the property. However, these are the minimum steps to sell a home in Montreal.
Stage your home
The objective of staging is to frame your home in such a way as to highlight its best features and make it appealing to potential buyers. This means that you need to remove any distractions, so that potential buyers’ attention stays focused on your home’s strongest features. Here are eight industry insider tips that can help you stage your home.
1. Clean your home
A clean home is easier to sell quickly and at a better price. Here are four reasons why:
- Removes distractions: Clutter or mess draws attention away from the home itself.
- Shows care: A well-maintained, clean home signals to buyers that the property has been looked after.
- Creates space and light: Clean surfaces and floors make rooms feel bigger, brighter, and more inviting.
- Reduces buyer anxiety: Buyers can focus on the home’s potential rather than on dirt, helping them picture themselves living there.
For example, in your bathroom, replace old or dirty caulking with fresh caulking and fix any leaks under the sink. Swap out shower curtains with hard water stains or soap scum, and make sure all surfaces are clean. Ensure the toilet is spotless, the lid is down, it refills properly, and it operates quietly (buyers often test it during showings). Remove items from the floor such as plungers, mops, brushes, and laundry hampers to maximize space and make the bathroom feel tidy and inviting.
2. Depersonalize your home
When you stage your home, you should remove very specific items that only appeal to one type of buyer and instead leave subtle aspirational cues that appeal to a broad demographic. To do this, use neutral décor, clean surfaces, tasteful artwork, and broadly appealing lifestyle hints such as travel magazines, plants, or classic books. This can suggest the life and social status that your home offers. These cues help buyers connect emotionally with the space and imagine themselves living there, without turning off anyone who might not share very specific tastes.
As part of this, you should remove any family photographs, flags, religious symbols, controversial or potentially offensive books. If you have children, you should remove posters from the walls and put away children’s toys. This will help depersonalize the space so buyers can more easily imagine themselves living there.
3. Declutter
The goal of decluttering is to remove anything that might distract your prospective buyer from seeing how beautiful your home is.
This means that you want to reduce the amount stuff that is physically in your house by about 20 – 30%. To do this, you should take your stuff and move some of it into storage or leave it with family and friends. If you have less stuff, it will make your living space appear bigger than it is. For example, if you remove 30% of the clothes from inside your closet, buyers will feel like the closets have ample space for their stuff. Clean windows, lots of natural light and high watt bulbs will also increase the sense of space and brightness throughout the home.
You also want to keep surfaces mostly clear, this means tables, dressers, night stands and so on. When you clear your surfaces, think strategically where to place things. For example, if you have a kitchen and this has beautiful counter tops, then you want to keep these completely clear. On the other hand, if you have not such a beautiful counter top, then you might choose to place a couple of well positioned items on the surface.
4. Consider colours and textures
Generally speaking you want to use neutral colours when staging your home. For example, you should use white bed spreads, light-coloured linens, and simple, understated décor to create a calm, neutral backdrop. Some realtors recommend using a single “pop of color” to add visual interest to the room. However, design psychology suggests that bold accent colours can be distracting and may limit a buyer’s ability to imagine the space as their own.
Instead of using a single pop of color, you can add items that give the room multiple textures (for example: wood, metal, glass, fabric, stone). A room with multiple textures can feel more expensive because the textures create visual depth. By contrast, flat, single-texture rooms tend to feel cheaper because they look one-dimensional and builder-grade. To add textures, you can add rugs, throw pillows, woven baskets, velvet curtains and so on.
5. Add greenery (biophilic design)
You can add greenery to your home, such as real or faux plants. These will make your home feel brighter, more welcoming, and full of life. This approach used in interior and architectural design known as biophilic design.
6. Hang pictures at “gallery height”
When staging a home, you are staging it for photographs and showings, not for everyday living. Artwork should therefore be hung at what is known as “gallery height”, with the centre of the piece positioned approximately 57–60 inches from the floor. This aligns with natural eye level, it photographs better, and creates a more balanced, professional-looking space.
7. The rule of three
The rule of three in home staging is a simple design guideline that says objects look more balanced and visually appealing when grouped in threes. For example, three decorative items on a coffee table, three pillows arranged on a sofa, three accessories on a shelf or console. The reason that this works is that it will make you home feel styled but not overdone, whilst also helping rooms photograph better for listings and create a subtle sense of balance that buyers read as “professionally staged”.
7. 60 / 30 / 10 rule
Another design rule that sellers use is the 60 / 30 / 10 rule. This rule suggests that 60% of a room should be a dominant, neutral colour, 30% should be a secondary supporting colour, and only 10% should be an accent colour.
Photograph your home
Once your home has been staged, the next step is to photograph your home. High quality real-estate photographs require a lot of skill and, since the photographs are key to making any property stand out online, most professional realtors will work with a professional photographer to do this.
A professional photographer will cost you roughly $150 – $400+ for a standard real‑estate photo shoot in Quebec, depending on the size of the property and the number of images delivered. Given that for many people, a home is a valuable asset and high quality photographs can increase the price that your home sells at for tens of thousands of dollars, we would recommend hiring a professional photographer to take pictures of your home. However, if you want to do this yourself, the most commonly used photographic technique used in real-estate is something called bracketing.
Bracketing is where the photographer will take multiple photos of the same room at different exposure levels. The photographer will then use editing software like Adobe Lightroom to combine the images together, so as to produce a single well-balanced photo that captures both bright and dark areas in full detail. To implement this technique, you will need a wide angle lens (18 – 20MM), a tripod and image editing software.
List your property on the MLS
The multiple listing service (MLS) is where real-estate agents and their brokerages put houses that they are listing for sale, so that they are all in one place, so that they can share them with each other and with sites like Centris.ca and Realtor.ca. Many sellers list on the MLS because they believe that it will distribute their property to a wide network of realtors and popular real estate websites, maximizing exposure to potential buyers. However, two groups of people can list on the MLS, these are:
- Real-estate agents and their brokerages
- Flat fee MLS service companies
If you want to sell you house without a realtor, and you want to use the MLS, then your only option to use a flat fee MLS service provider. The fee to do this is typically much lower than the fees charged by a traditional broker. Popular sites in Montreal include honestdoor.com and propertymesh.ca.
Once you have chosen a flat-fee MLS service company, you will need to sign a listing agreement. This listing agreement will line out the terms of service, the duration of your listing and the fees associated with the listing. Different flat-fee MLS service companies offer different levels of service. For instance, some may actually help you create your listing, fill in the paper work, give you a sign to put outside your home and so on.
Use social media to promote your home
You may want to use your social media to promote your home online. For most FSBO sales, this will mean that you will create a social media post on Instagram, Facebook and Facebook Marketplace and TikTok. Each post should use the same photographs and / or video of your property that you uploaded to the MLS. The idea is to get the images of your staged home in front of as many people as is humanly possible.
Social media promotion is a whole game in and of itself. However, some simple things that you can do include, asking friends and family to like, commend and re-post your post on their social media accounts.
4. Sell your property
If you have correctly marketed your property, you will be attracting online interest. The next step is to convert that online interest into hard offers to purchase your home. To do this, you will need to meet with potential buyers and actively sell them your home. The best place to do this is at either: a private showing or an open house.
How to sell at a private showing
A private showing is when a prospective buyer schedules a private showing of your property, often with the guidance of a realtor. To arrange this, the buyer or the realtor will reach out to you directly through either your contact information on the MLS or via one of your social media posts. They will then schedule time to come to your home and look around.
Selling is largely about asking the right questions to understand why prospective buyers are interested in your home. Once you understand a buyer’s motivation, you can focus the conversation on the features of the property that matter most to them. For example, buyers with young children may be particularly interested in proximity to daycares, the quality of local schools, and neighbourhood safety. Other buyers may place greater value on walkability to restaurants and shops, or proximity to work and entertainment.
Importantly, there is no single “type” of buyer. Individuals, couples, and families all have different priorities. The only reliable way for you to understand a buyer’s interest, is to ask and listen. For this reason, we generally recommend that FSBO sellers are physically present during a private showing. This will allow you to engage with visitors and respond appropriately to their questions and priorities.
The first question should always be, “Do you guys live in the area?” This will start a conversation that will ultimately allow you to know why they want to buy your home.
How to organize an open house
An open house is a scheduled period during which a property is made available to the public for viewing. In real estate, open houses are used to generate interest from potential buyers, answer basic questions about the property, and to create a sense of buyer urgency through competition. Typically, an open house can be broken down into three stages:
- Preparation – getting the property and marketing materials ready for public viewing.
- Hosting – welcoming visitors, managing access to the property, and providing general information during the event.
- Follow-up – contacting interested parties and gathering feedback after the open house.
Preparation
Preparation for an open house is largely the same as when you staged your property. However, often time has passed since the initial staging, and the property may need to be re-staged before the open house. There are also some additional details that you need to take care of before welcoming visitors into your home. These are:
- Before you start your open house, make sure to mow your lawn, trim your hedges, remove any trash or clutter from view, and move any cars from the driveway.
- Make sure to secure valuables and any prescription medications so they are out of reach during the open house.
- Turn on all the lights in your home (including any accent lights).
- Declutter all surfaces.
- Remove any trash cans, and put them in a garage or a pantry.
Hosting
When the open house begins, position yourself in the kitchen. Buyers naturally spend time here because the kitchen is often one of the most important rooms in the house and they are trying to assess how the kitchen will work for everyday life, the quality of finishes, and how it might affect the home’s resale value. The kitchen is also a comfortable place to have informal conversations, so being there allows you to offer refreshments to visitors, to create a friendly, welcoming atmosphere, where you can engage visitors to find out why they are interested in the property and to collect their contact information for follow-up.
Follow-up
Now that the open house has completed, you must call, text or email visitors who left their contact information within 24 hours. If you had a lot of visitors to your open house and many of these visitors verbally expressed interest in the property, then it is worth setting a time limit of 3 – 5 days to collect up all the promise to purchase documents. Keep your messages short and direct (especially if you are speaking with buyers agents).
If a prospective buyer (or their agent) calls you to discuss the list price or terms and to see if you will be flexible, ask them to submit their offer in writing so that you can consider it properly. Do not discuss pricing or terms on a phone call. This is because it a verbal discussion creates a lot of risk for the seller without any upside. If the buyer’s agent asks “do you have any offers yet”, simply say that you have set an deadline for all visitors to your open house to submit offers by a particular date and, from conversations that you’ve had, you do expect several competitive offers to come in by then.
5. Negotiate with prospective buyers
When a buyer wants to purchase your home, they must send over the terms in the promise to purchase. This contract sets out the buyer’s offer, including the price, conditions, and timelines for purchasing your home. Once you have one or multiple offers on the table, it is time to start negotiating with prospective buyers. At this point, you will either have: one offer or multiple offers to buy your home.
If you receive only one offer, you can start negotiating right away, or let the buyer know that you have additional showings scheduled over the next few days and would like to gather feedback before making a decision. Alternatively, if you have multiple offers, you can send a polite email to all of the individuals and agents who attended your open house and say: “we have multiple offers, if you are still interested, could everyone please send in your highest and best offer“.
Negotiation should be a logical, non-emotional discussion with prospective buyers. If you have correctly priced your property, there is little reason to lower your price. This is unless, the buyer or their agent can:
- Clearly justify a lower offer with concrete evidence (such as the cost of repairs);
- You feel okay to reduce reduce the price;
- You have no other offers or viewings lined up;
- You want to sell now.
Remember: You are the owner of the property and you are under no obligation to reduce your price just because a buyer’s agent tells you to. That being said, it is important to listen to the feedback from the market. If you are consistently getting prices that are lower than you expect, you should ask the buyer to provide their reasons. If the reasons are make sense, for instance if you have used the wrong comps, then you may want to consider adjusting your price down.
Expert Tip
6. Navigate the conditions period
Once you have agreed on the terms and conditions of your house purchase with a prospective buyer, you will sign the conditional promise to purchase. This turns the promise to purchase into a legally binding contract between you and the buyer. At a high level, the contract states that you have irrevocably agreed to sell your home to the buyer. However, the buyer will only purchase your home if the conditions set out in the promise to purchase are satisfied or waived within the specified timeframes.
In this section, we cover common buyer conditions and practical ways to address them without reopening negotiations or getting lost in the paperwork.
– Under Article 7.6 (Damages): If no deed of sale is signed through the Buyer’s fault, the Buyer acknowledges that, in addition to any damages owed to the Seller, the Buyer may be required to compensate the Seller’s broker or agency for their lost remuneration in accordance with ordinary law.
– Under clause 10.7 (Damages): If no deed of sale is signed through the Seller’s fault, the Seller acknowledges that, in addition to any damages owed to the Buyer, the Seller may be required to compensate the Buyer’s broker or agency for their lost remuneration in accordance with ordinary law.
How to survive the home inspection
In Quebec, the buyer can choose to get the house inspected before they complete the transaction. What typically happens here is that the buyer will hire an inspector who will create a long list of small defects with your property. The inspector will share these with the buyer who in turn may decide to share this list with you and ask you to pay for the repairs.
It is important to note that, while you are not legally required to fix anything, if something major shows up the buyer will be allowed to cancel the promise to purchase from their side. “Major” typically a single defect that will cost 3% of the purchase price to fix. For example, foundation issues, problems with the roof or significant electrical, plumbing, or heating system failures.
Small and insignificant things that you are not legally required to fix can still create a problem since, some buyers may still threaten to walk away and attempt to re-open the negotation. Even though the buyer is not legally allowed to cancel the promise to purchase, it may still be better to negotate with them to save having to go through the entire process of listing your property again or having to go to court and deal with the stress or costs of that process.
How to navigate the home appraisal
Many buyers make their home purchase conditional on obtaining financing. Even if a buyer has a mortgage pre-approval, the lender must still confirm that the property is worth the amount being borrowed. This is because the home itself serves as security for the loan, and the bank needs to ensure it is not lending more than the property’s market value.
To do this, the lender (or sometimes the buyer) will hire a certified appraiser to visit the property and complete a home appraisal. To reduce the risk of receiving a lower-than-expected valuation, make sure the property is clean and well presented. You should also prepare a list of any renovations or repairs you have completed. This list should include the type of work done, the approximate cost, and the date it was completed.
When the appraiser arrives, it is advisable to be present to answer questions and provide access to the property. If the appraisal comes in lower than expected, you should also be prepared to justify the listing price using recent comparable sales or documented improvements to the home.
What paper work you need
In Quebec, buyers usually ask for paperwork that helps them verify the property’s legal status, physical condition, and ongoing costs. In addition to the certificate of location and the seller’s declaration, this will include things like:
- Utility and operating costs (e.g. Bills from Hydro Quebec)
- Property tax bills (municipal and school tax)
- Renovation and repair records
7. Know your rights and obligations
As a seller, you have certain rights that are automatically granted to you when selling your house. You also have certain mandatory obligations. In this section we break down what are your rights and obligations.
What are your obligations as a seller
1. Deliver the property in the same condition
You are required to leave the property in substantially the same condition as when the buyer agreed to purchase it, subject to normal wear and tear. The date of reference is typically the buyer’s visit or inspection, as recorded in Clause 6.2 of the Promise to Purchase.
2. Be the legal owner of the property
You must be the lawful owner of the property. This will be verified by the notary through a title search before the deed of sale is signed.
3. Spousal consent (family residence)
If the property is considered a family residence, spousal consent may be required, even if only one spouse is on title. This is addressed in Clause 10.6, and failing to account for it can delay or block the sale.
4. Tax residency declaration
You must declare that you are a Canadian resident for tax purposes and that you do not intend to change your tax residency before the deed of sale is signed. This affects withholding requirements and is taken seriously by notaries and buyers.
5. Exclusivity of the sale
You must confirm that you have not already agreed to sell, exchange, or lease the property to another party. Once a Promise to Purchase is accepted, you cannot entertain competing agreements.
What are your rights, as a seller
1. Protection against bad-faith behaviour
If a buyer deliberately acts in bad faith to derail the transaction — for example, by failing to cooperate without justification — the Promise to Purchase typically allows you to seek compensation for damages.
2. Commitment from the buyer
Once you accept a Promise to Purchase, the buyer cannot unilaterally cancel it unless:
- a specific condition (financing, inspection, etc.) is not met, or
- the offer was drafted with an explicit expiry or cancellation clause.
Outside of these conditions, the agreement is binding.
Final remarks
In Quebec, you are legally allowed to sell your home without a realtor. However, the process can be time-consuming and complex, and it requires a solid understanding of pricing, negotiations, legal obligations, and buyer psychology.
For some people, selling without a realtor is the only realistic option — for example, if you are trying to avoid paying a commission, if you are selling to a family member or friend, or if your financial situation makes every dollar count.
That said, going it alone also means taking full responsibility for the transaction. You will need to manage inquiries, screen buyers, negotiate terms, coordinate inspections and financing conditions, and ensure that all legal requirements are met before closing.
If you take the time to prepare properly, understand your rights and obligations, and stay organized throughout the process, selling your home without a realtor can be done successfully. The key is knowing where the risks are — and making informed decisions at every step.